Showing posts with label decorations. Show all posts

Wednesday, April 4, 2012

Quick Crafty Project :: Mini Paper Bunting

A fun little project that anyone can make. You don't need any special tools. This could have easily been made using a pen/pencil/marker to write the message on each little flag. However, if you are feeling a little bit more crafty and you have access to some lettering stamps and ink, then go for it!


Materials I used:

* card stock/paper
* scissors
* wooden skewers
* twine
* hole punch (I used a single hole punch but a two hole one is fine )
* lettering stamps
* stamping ink (my colour was Harbor Blue by ColorBox)

Step 1:   Draw and cut out a template flag of your chosen size and shape.  Mine were tiny ones measuring about 3cm wide by 3.5cm long.  Once I was happy with the size, I used that template to trace onto the card stock/paper.  I used scrapbooking card stock in various patterns and shades of pale blue.

Step 2:   Once you have cut out enough flags for the message you wish to write, line them up and get ready for the stamping!
Step 3:  Stamp or write your message.  If using ink, make sure you let each letter dry before punching the hole on each corner.

Step 4:   Once you have written or stamped your letter, then take the hole punch and  carefully punch a hole on each top corner - making sure that you leave enough room between the hole and the edge of the flag.  I suggest cutting extra flags so you can try lining up your hole puncher to the edge.


Step 5:   Once you have punched 2 holes on each flag, then you simply thread them with the twine (use more twine than you need as you can always cut the excess away).   Then tie each row of flags to the wooden skewers.  I used 2 cups to hold the skewers in whilst I did all all the tying.  


Tadaaaaa.  Its done!  I think the Birthday Boy was very impressed :-)   It was a fun project to do and made for a nice keepsake.

I love Birthdays.....how can you not?  When there is laughter, yummy food and cake!  happy times!

Monday, March 26, 2012

Pom Pom Hooray!


 A wonderful weekend away with Martino at the wedding of A+F.  We laughed, danced, chatted and felt totally inspired by the stories of the people we met, the love and warmth of the event and the beauty of the surroundings.

The afternoon before the big day involved a little participation from crafty curious folk.  The peeps wanted to know all about the complexities of the tissue paper pom poms.   Therefore, after a little tutorial, my crafty team grew from this.....

to this:


I think some people were totally inspired to get their crafty on....  which made me very     H A P P Y!!    This meant that the big job of carefully opening and fluffing up the pom poms was made that much easier - many hands/light work and all ;-)  .  By the end of that afternoon, our cabin was filled with the tissue paper pretties,  ready to be hung up the following morning. 


After the ceremony rehearsal and a little breakfast, the exciting job of putting the decorations up began....


Having help from many qualified Architects (and their well known eye for detail) felt a little daunting at first.....but I need not have worried.  The result was more beautiful and effective than I could have imagined:

The very clever groom made these pretty tea light candle holders.....very effective and thrifty!


I am truly honored to have been asked to have my crafty input on this very special event.    To have the guests enjoy these creations and to take them home at the end of the weekend, was more than I could have wished for.  Craftyclaudes made with love, to be enjoyed by others, because they also fell in love with them.  Super!

Tuesday, March 20, 2012

Wedding decorations

"Hang in there Claudes.....and take that magic concoction we mentioned"  - herbal remedy advice from Alba y  Miguel...

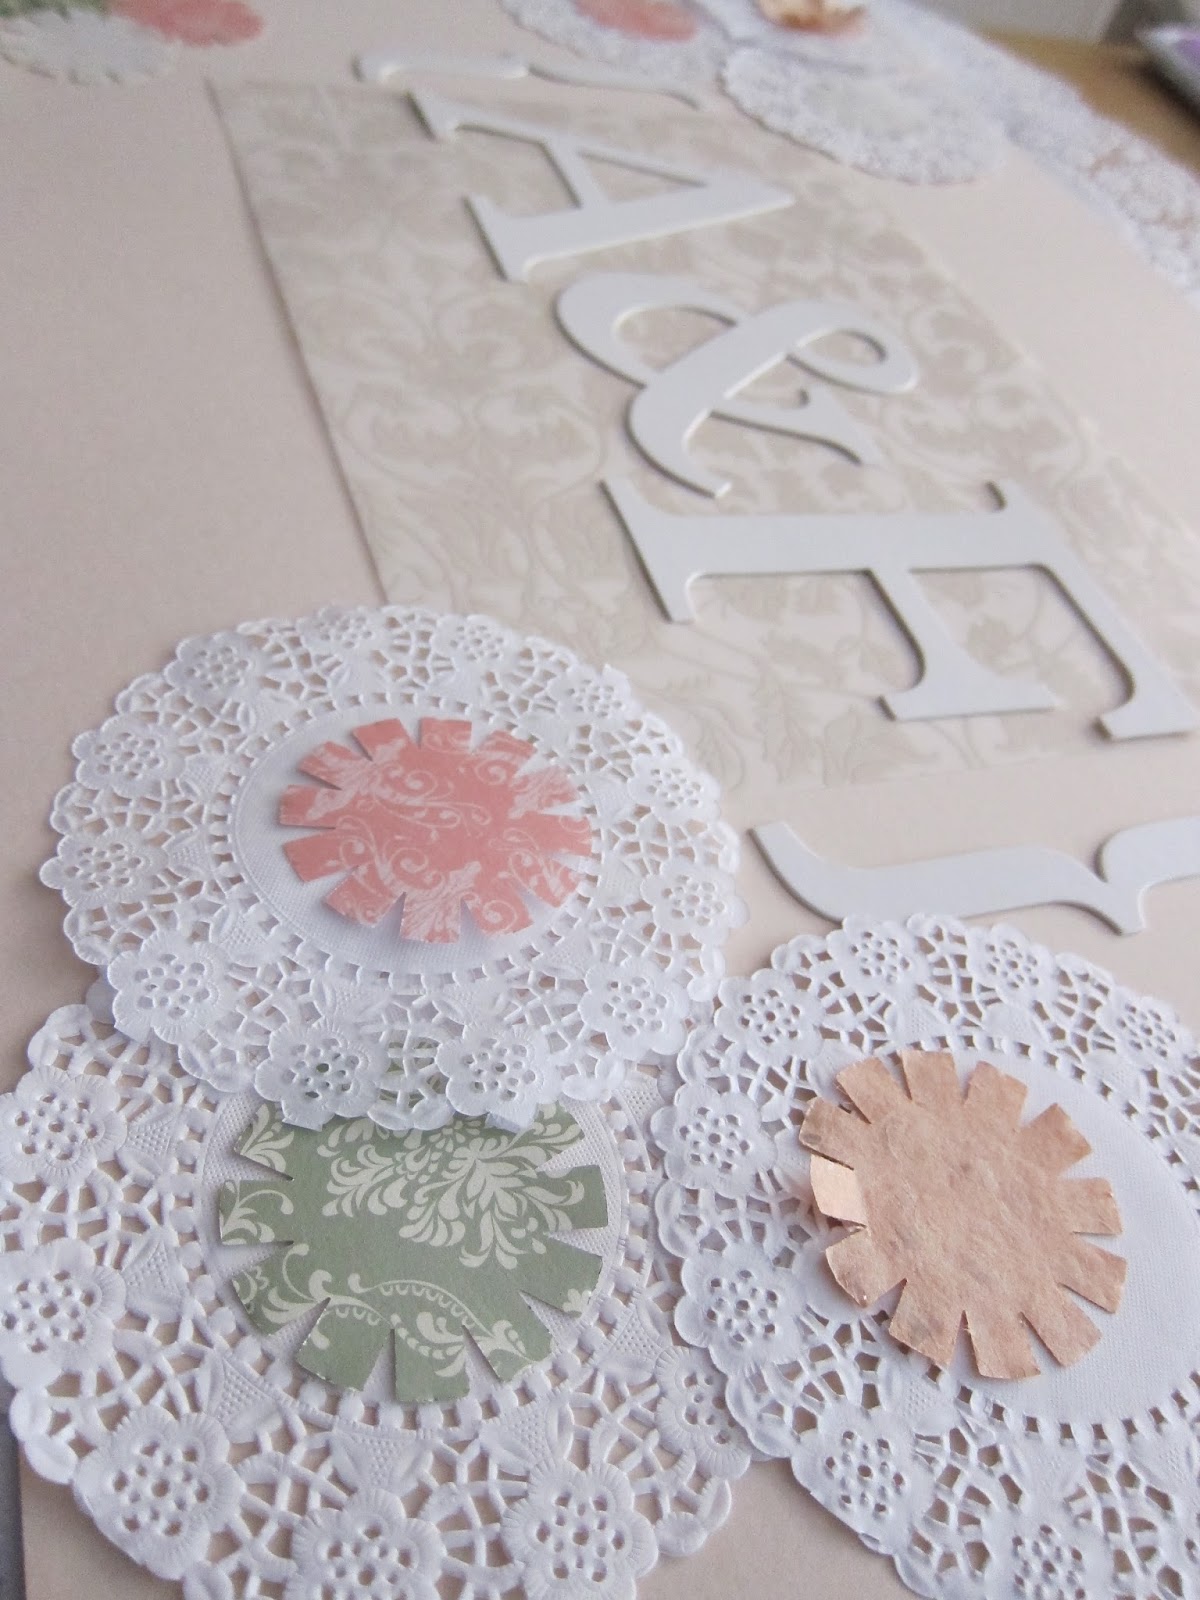
My crafty mood took a battering last week as I battled a case of the flu which really drained all energy (crafty kind included) and all I was good for was sleeping and drinking lemonade.  Even catching up on my blog reading list was a struggle. Fevers, chills and crazy nightmares took over.   However, this week I am back to feeling almost normal, which is just as well as we have a wedding to go to!  Weddings make me happy and excited.  A dose of L.O.V.E  will cure all that ails me I am sure.   I have now finished the wedding decorations for the event.   Sixty odd tissue paper pom poms in various sizes and shades of white.  Paper doily banners, felt buntings and a sign for the photo booth all now ready to go.    Here is a quick tutorial on the sign I made for the wedding photo booth:


Project:  Super Easy  Wedding Photo Booth Sign


Materials I used:
-  Foam Core for this project I used 60cm x 40cm
-  Paper doilies (various sizes)
-  Scrap booking paper slightly smaller than the foam core (for this project I used 50cm x 30cm)
-  Scrap booking letters
-  Double sided tape
-  Paper punch
-  Scissors
-  Twine


Step 1:   I cut long strips of double sided tape and placed them along the edge of the foam core and one strip across the middle.  I then placed the paper doilies around the foam core to form a pretty scalloped edge.  I placed the cream coloured card stock to cover up the remainder of the doilies. (I did not take a picture of that step but you will see below what I mean).


Step 2:  Using my paper punch I cut out these little shapes from various scrap booking paper sheets.


Step 3:   Using double sided tape I stuck these paper cut outs to the centre of the paper doilies.


Step 4:   The rest was as easy as placing the various elements - Scrap booking Letters, doilies, paper cut outs etc - using double sided tape to stick them to the foam core.  Finally using some tape to secure the twine to the back of the foam core ready for hanging.


Here is the finished sign:


Sorry the photos are a little dark. I finished this project late in the evening.....you have to take advantage of the creativity when it hits you.  


Thursday, March 8, 2012

Wedding decorations - Tissue Paper Pom Poms

This one....I get to keep in our hallway.  A little bit girlie chic.

We have a family wedding coming up soon.  The lovely Miss A and her handsome beau Mr F.  The wedding celebrations will take place over a weekend and will be in true Aussie style - a beach and bush wedding. We are very excited and honored to be part of this special weekend.  To help out I am making the decorations which consist of tissue paper pom poms of all sizes as well as decorations for a photo booth backdrop.   As the surroundings will be all natural the decorations are to be very simple.  So we have decided on all white pom poms.   Here are some pictures of the project so far:
Pink test pom poms.  I loved how these turned out. Very puffy and fluffy and pink.  Wonder if Martino will notice if I filled our bedroom with these?

 My aim is to create 80 of the little puffy pretties in 3 different sizes.  They will be hung with some clear fishing line all around the dining pergola/main area kind of like these:

Via Pinterest

As we have a big 3 hour drive to the venue, I have got all of them to the point where they just need to be opened and hung.
ready to be opened up
These were very easy to make using tutorials I found all over the net, especially, on Youtube.    So next time you are looking for party decorations why not give these a go. For the $1 investment in tissue paper, the results are very striking and will last much longer than a balloon.