Showing posts with label diy. Show all posts

Wednesday, July 4, 2012

Enjoying every moment.......


I have been enjoying these crispy wintery days.  The air fresh, the sun warming and very welcomed as I walk to work.  Along my walks I think a lot.  About how lucky I am to live this life, at this time.  To be surrounded by people who make me laugh, inspire me and are kind.    People who are interested and interesting.   I love that my days are filled with these interactions.   To me, it is important to recognize this and even more important, to be thankful for it.  

I am also enjoying  this yummy creation.  DIY Muesli!

I received homemade muesli as a birthday gift a few weeks ago. A very scrumptious and nourishing gift made by my beautiful friend Theresa (si chica...).    The cold mornings and my power walks to the office require a little treat and having this with boiling water (no milk for me thanks) has made THE best breakfasts this season. 


Having finished the supply I received, I asked for the recipe and found it very easy to make.  So I got to toasting the organic oats under the grill.  I sprinkled ground cinnamon and cardamon before placing under the grill for a few minutes.  The apartment filled with the scent of these beautiful spices. 


After toasting the oats for a few minutes and setting them aside.  I toasted a selection of raw nuts, seeds and shredded coconut.  For my selection I used :

Macadamia, pistachio, cashews, almonds, sunflower seeds, pepitas, sesame seeds and shredded coconut.


The smell of toasted coconut and cinnamon.....if you close your eyes, you could be wandering the spice bazaars of Morocco and India!!  ahhh...my senses taking a little trip from my kitchen.


I wanted to add some natural sweetness to the Muesli so I opted for some  of Queenslands finest little raisins (of sunshine) as well as tart cranberries.


Ready to be enjoyed this winter......
Loving these days.......

Friday, May 18, 2012

One IKEA Rug.....

via


These striking rugs are all hand painted.   All of them started off as a very affordable  IKEA rug that was begging for some creative expression.  I think the results are priceless.....

via


via
via

via
via

via

Wednesday, April 4, 2012

Quick Crafty Project :: Mini Paper Bunting

A fun little project that anyone can make. You don't need any special tools. This could have easily been made using a pen/pencil/marker to write the message on each little flag. However, if you are feeling a little bit more crafty and you have access to some lettering stamps and ink, then go for it!


Materials I used:

* card stock/paper
* scissors
* wooden skewers
* twine
* hole punch (I used a single hole punch but a two hole one is fine )
* lettering stamps
* stamping ink (my colour was Harbor Blue by ColorBox)

Step 1:   Draw and cut out a template flag of your chosen size and shape.  Mine were tiny ones measuring about 3cm wide by 3.5cm long.  Once I was happy with the size, I used that template to trace onto the card stock/paper.  I used scrapbooking card stock in various patterns and shades of pale blue.

Step 2:   Once you have cut out enough flags for the message you wish to write, line them up and get ready for the stamping!
Step 3:  Stamp or write your message.  If using ink, make sure you let each letter dry before punching the hole on each corner.

Step 4:   Once you have written or stamped your letter, then take the hole punch and  carefully punch a hole on each top corner - making sure that you leave enough room between the hole and the edge of the flag.  I suggest cutting extra flags so you can try lining up your hole puncher to the edge.


Step 5:   Once you have punched 2 holes on each flag, then you simply thread them with the twine (use more twine than you need as you can always cut the excess away).   Then tie each row of flags to the wooden skewers.  I used 2 cups to hold the skewers in whilst I did all all the tying.  


Tadaaaaa.  Its done!  I think the Birthday Boy was very impressed :-)   It was a fun project to do and made for a nice keepsake.

I love Birthdays.....how can you not?  When there is laughter, yummy food and cake!  happy times!

Thursday, March 29, 2012

Tuesday, March 13, 2012

Once upon a time I was a.......

In this series I share with you some pretty cool projects I have seen around my virtual travels. Take everyday objects (ones that we usually throw away without a thought) a tutorial and a few basic tools to create  unique recycled pieces.   Check these out:


A globe becomes a lampshade

via here

A big pretty out there jumpsuit becomes a chic dress


Check out this clever refashion and many many more here
Your old beer/wine bottles become gorgeous decorative vases


via here


 Bottle cap + Magnet = jazzes up your fridge

Via Here

There are so many resourceful people in the DIY, craft and refashion community.  I hope to share many more of my findings.

Saturday, April 2, 2011

Date for your diary:: Powerhouse Museum Sydney - Quarterly Craft Weekend: 30 April-1 May


The first in a series of quarterly craft weekends will be held at the Powerhouse Museum on 30 April and 01 May.  You will be able to take part in some fun FREE drop in workshops like beginner knitting, recycled jewellery making and embroidery.  There will also be a couple fun looking paid classes one of which involves creating your very own Zipper Mouth Monster.  how cute are they!
photo credit

Zipper mouth monster: sew up your skills with Colette Guanta, Tessuti Fabrics
30 April, 10.30am – 2.30pm
$80 per person
All materials and equipment, including Jodie Carleton’s monster pattern and Tessuti Fabric are supplied; participants should have some experience with using a sewing machine
The sewing skills of Colette Guanta from Tessuti Fabrics join forces with the design nous of Jodie Carleton from the popular Ric Rac blog, making a terrific workshop experience.  Learn how to sew an edgy stuffed monster with a loud mouth.
This workshop is supported by Tessuti Fabrics and Brother sewing machines.


For more details including times and prices check out the Powerhouse Museum site

Looks like fun!

Thursday, December 16, 2010

A year round wreath....

I had bought this wreath with the intention of decorating it for Christmas.


Inspired by this beautiful idea:

Tutorial can be found here

However the other day I was looking through my fabric stash and found this beautiful apricot colored satin trim.  It once belonged to a blanket that I cut up to make more of my owlies.  I took the trim and wrapped it around the wreath.  Kept it all in place with some white dressmaking pins.  I then cut up some felt butterflies in a matching apricot color and also used pins to keep them in place.  Finally,  I used the pages of an old book I found during a recent council clean up.  A paper punch used to give them their shape.  Here is the finished wreath:


It now decorates our apartment door.


It only took me less than 15 minutes and really cost $2.99 for the wreath as everything else I had here at home.  

ps:  Dear Santa....If you are reading this post....please I would love love love one of these for Christmas.   As my mobile phone camera no longer does it for me.  


Thursday, November 18, 2010

Spruce Austin - Chair love

These guys are just too cute. It makes me want to cry at how cute and exciting and interesting and fun they are!  Its like a group of best friends all working together on fun projects with access to amazing fabrics and pieces of furniture. I would love love love to do that!  
 
The team at Spruce Austin all happy and smiley!
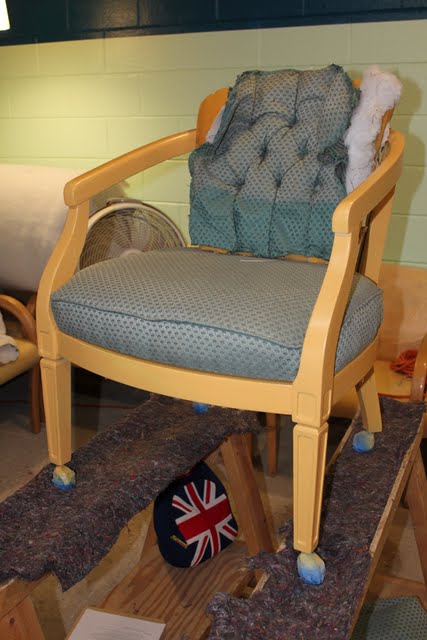
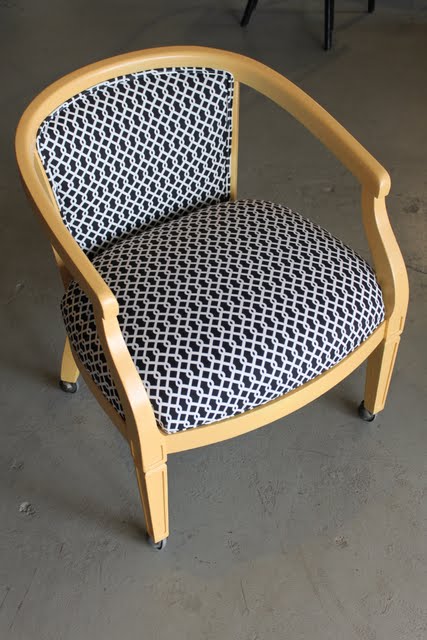
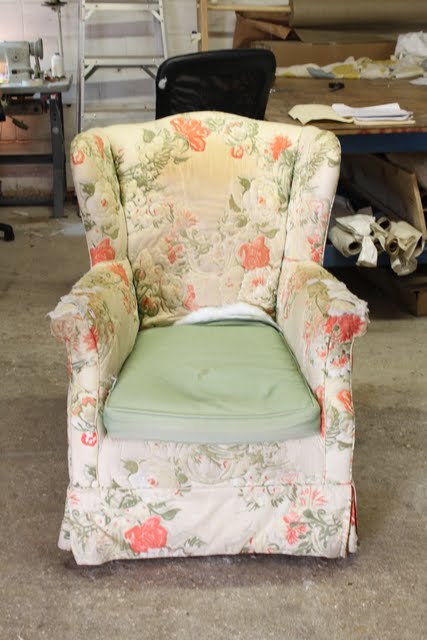
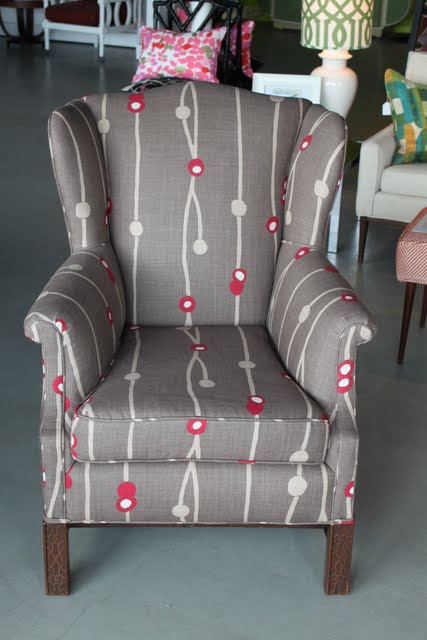
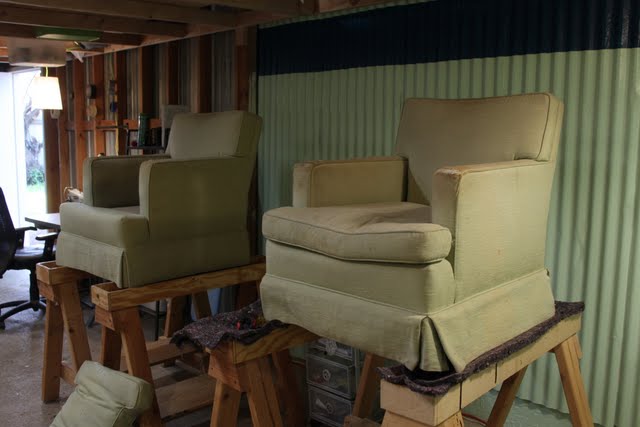
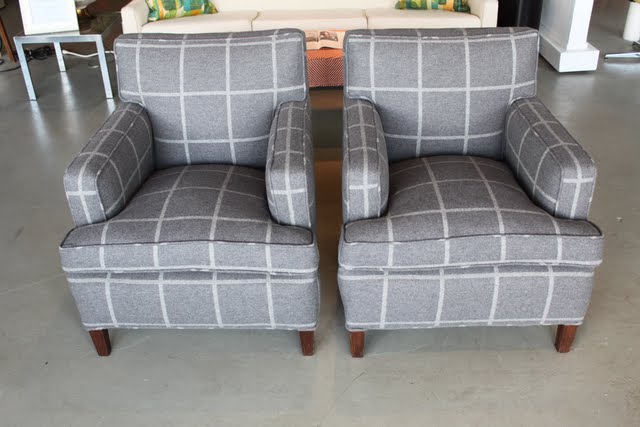
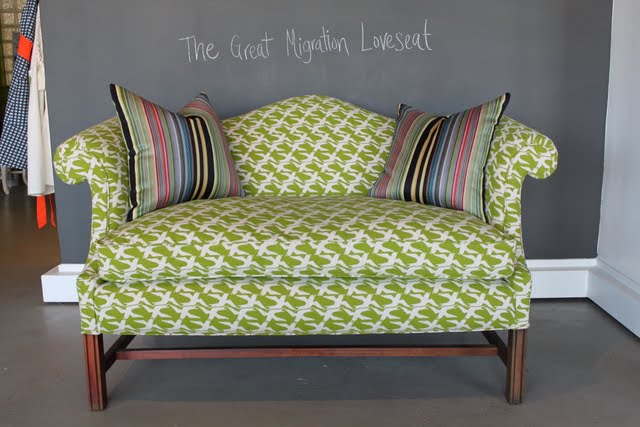
They run classes on re-upholstery where you byo chair and get to spend the day learning the ins and outs of making a chair come back to life with the help of some  very talented instructors and of course gorgeous fabrics.  Here are some pretty before and after projects from their recent classes:


Lovely huh!  and here are 2 of my favourites......


Now to save for that plane fare....Austin ima' comin' !


Tuesday, October 19, 2010

Project #4 - Chair for the bedroom - More chair love

Salvos find
I bought this chair a few months ago from the Salvation Army.   It cost $11.   After changing my mind one hundred times over what fabric to use, I decided to stick with my original idea and used this beautiful Ikea fabric I had stashed away from 2008.

IKEA - Ann-Cathrine Sigrid Stahlberg 2008

After some cleaning with soapy water, I decided that I would not be painting this chair.  I liked the beech colour and apart from a few scuff marks (which I managed to get out with a toothbrush and some warm soapy water) the chair was in great condition.

The tools come out......

So began the task of pulling it all apart.   Starting with the fabric covered piping that went around the chair to hide the staples.

 Taking off the cream coloured fabric was easy as it was very old and had some worn out sections. That revealed this tan/green striped fabric which was also ripped


Chair after some cleaning
Finally I was left with this layer of sponge which apart from a tiny section on the corner of the chair, was also in good shape.  So I decided to stop here and gave the sponge a good vacuum.


Using the old cover as a template, I traced out the shape leaving a 2.5cm (1 inch) allowance.  I also used my brand new pinking shears.  These come in very handy when cutting fabric.  If you don't have an over locker, these are the next best thing as they help stop the fabric from fraying too much.


Once cut, I lay the fabric back on the chair and used some tape to hold it in place. Then began the fun part, the staple gun work (my favourite).


This part is what needs lots of patience as you need to secure the fabric by placing a staple in the middle of each side of the chair first.  Once that is done, take it one section at a time and tightly pull the fabric and staple as you go.   I like to stop every couple of staples and make sure that the fabric has not moved and there are no creases.  I then covered the staples with the piping I made earlier.  This was the hardest part of the chair makeover.  I used this very easy tutorial which helped immensely!


So here is the finished product:


 Very pleased with how it turned out and of course now I have even more chair love than before.....if that is even possible!