Showing posts with label project. Show all posts

Wednesday, April 4, 2012

Quick Crafty Project :: Mini Paper Bunting

A fun little project that anyone can make. You don't need any special tools. This could have easily been made using a pen/pencil/marker to write the message on each little flag. However, if you are feeling a little bit more crafty and you have access to some lettering stamps and ink, then go for it!


Materials I used:

* card stock/paper
* scissors
* wooden skewers
* twine
* hole punch (I used a single hole punch but a two hole one is fine )
* lettering stamps
* stamping ink (my colour was Harbor Blue by ColorBox)

Step 1:   Draw and cut out a template flag of your chosen size and shape.  Mine were tiny ones measuring about 3cm wide by 3.5cm long.  Once I was happy with the size, I used that template to trace onto the card stock/paper.  I used scrapbooking card stock in various patterns and shades of pale blue.

Step 2:   Once you have cut out enough flags for the message you wish to write, line them up and get ready for the stamping!
Step 3:  Stamp or write your message.  If using ink, make sure you let each letter dry before punching the hole on each corner.

Step 4:   Once you have written or stamped your letter, then take the hole punch and  carefully punch a hole on each top corner - making sure that you leave enough room between the hole and the edge of the flag.  I suggest cutting extra flags so you can try lining up your hole puncher to the edge.


Step 5:   Once you have punched 2 holes on each flag, then you simply thread them with the twine (use more twine than you need as you can always cut the excess away).   Then tie each row of flags to the wooden skewers.  I used 2 cups to hold the skewers in whilst I did all all the tying.  


Tadaaaaa.  Its done!  I think the Birthday Boy was very impressed :-)   It was a fun project to do and made for a nice keepsake.

I love Birthdays.....how can you not?  When there is laughter, yummy food and cake!  happy times!

Tuesday, March 22, 2011

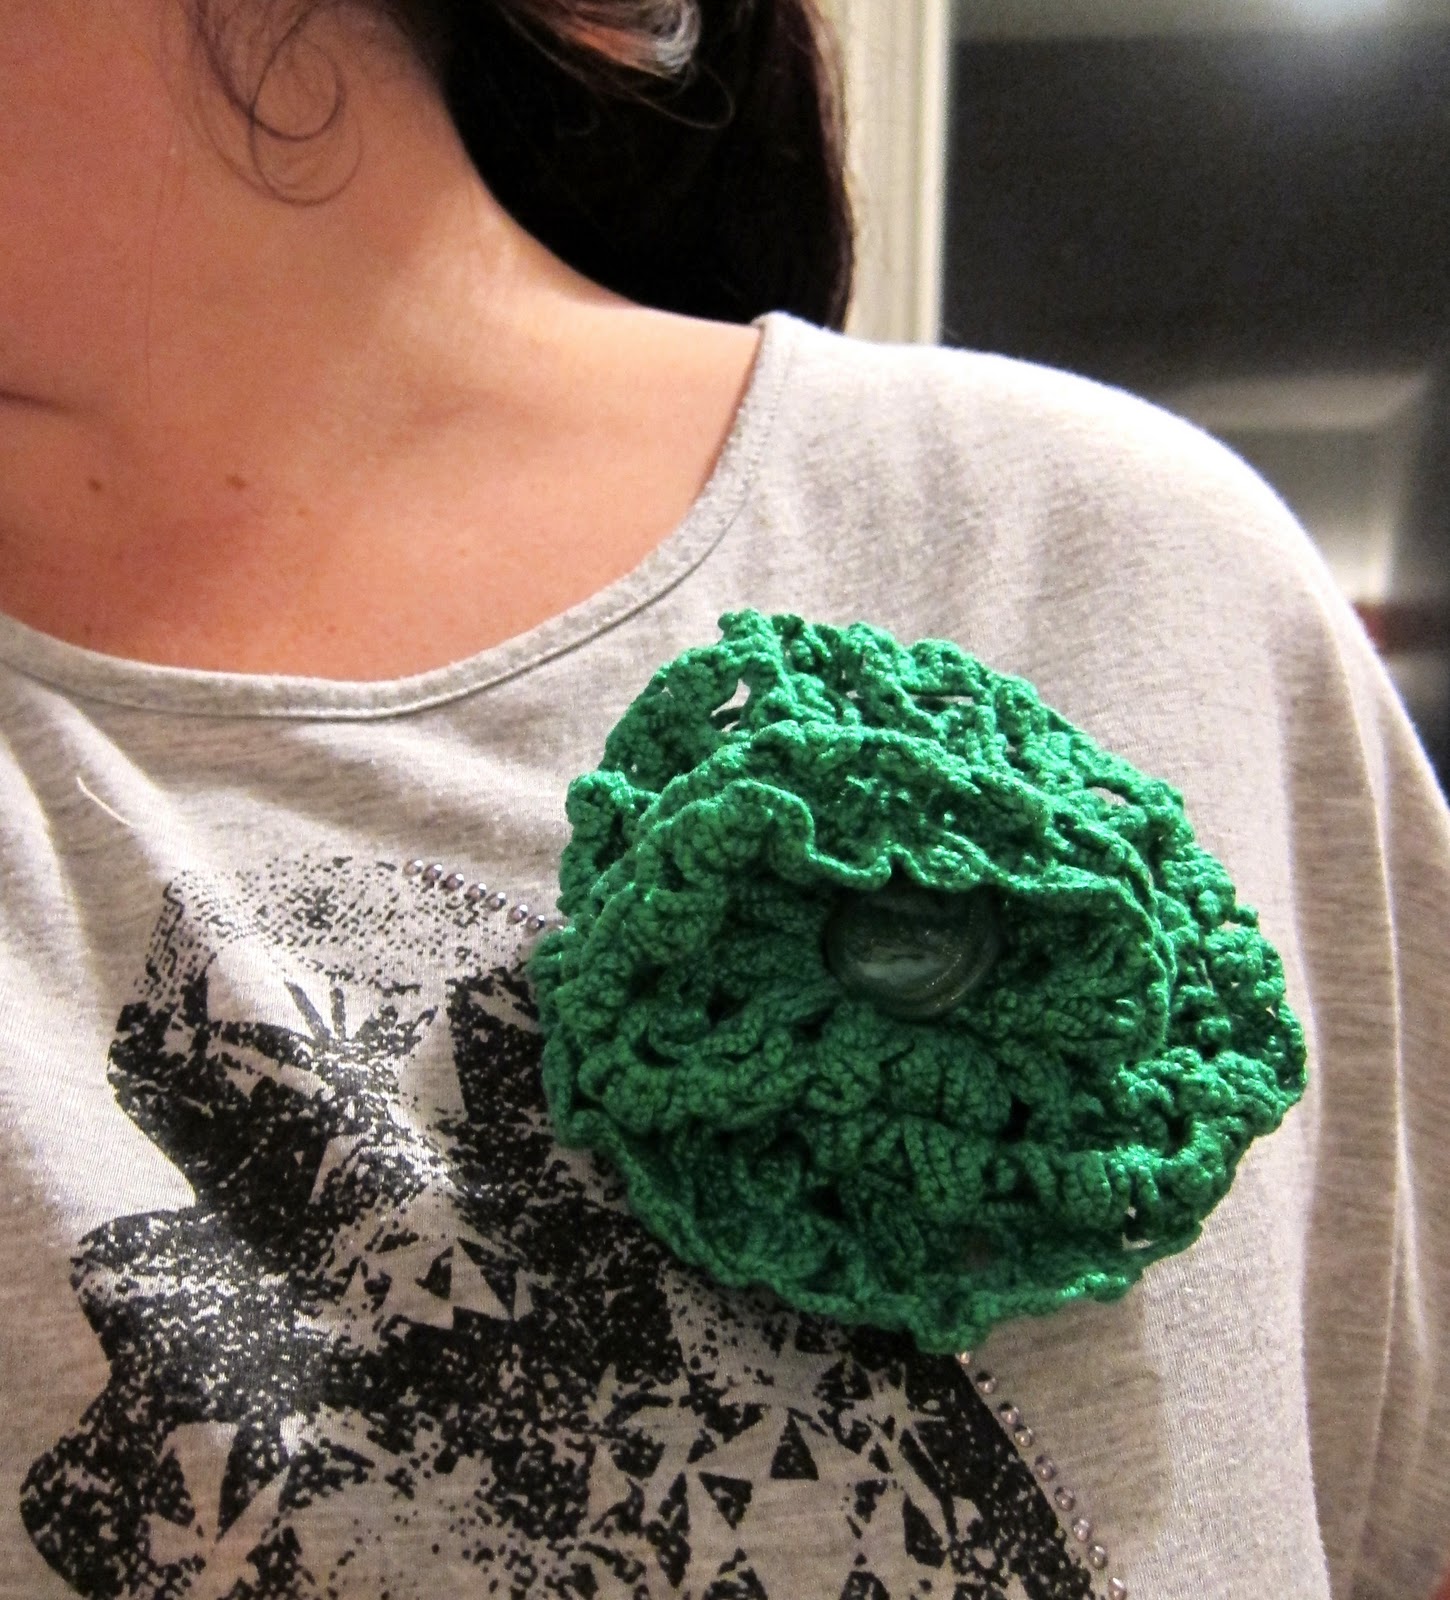
Repurpose project - Doily becomes a brooch

One of the good things about sharing with people your love for all things recycle/re-purpose/re-use, is that often, they will think of you when they come across something a little too special to throw out. So although they may no longer want or need the item their little thought bubble has your face in it! Case in point - this little doily.
I am loving doilies at the moment.  Using them to give the owlies a little feminine vintage flair.  However this doily, was a little too colourful for that.  So I gathered my supplies:

doily, scissors, thread,needle, random glass bead, felt scrap, brooch backing


I cut 2 pieces of felt from a scrappy piece. Using some embroidery thread I sewed on the brooch backing  to one piece then joined both pieces together with some decorative blanket stitching (which I am slowly getting better at)
I decided to sew a little glass bead I had in my jewelry stash to the centre of the doily.  This helped to hide all the stitching as well as give it some weight to help it look more like a flower.

Here is the finished product.   A fun project which even if you only have very basic sewing skills can be done in less than 30 minutes.  The doilies can be folded or scrolled or left flat even.  Your creation, your way.

Thursday, March 17, 2011

5 Minute repurpose project - Calendar becomes gift tags

Really Claudes? Yes! I know...its probably more like 1 minute.  I am prone to a little hoarding, especially when it comes to pretty cards and calendars. So on a recent declutter session of the crafty studio I decided to get my creative-on and save some trees at the same time.  You can too!
So take some old birthday/Christmas/wedding cards, calenders, post cards, recipe cards, etc.  Some scissors (or guillotine if that way inclined) and a hole punch....


If you have it, also some matching ribbon or twine saved from all those birthday/Christmas/wedding presents and hey presto....a new card ready for gifting!  These also make pretty cool book marks.   Easy peasy  - green and clean!

Thursday, March 10, 2011

Project #5 - Feather Earrings


A few years ago I had an Etsy shop for my jewelry creations.  Jewelry making was my first attempt at learning a crafty skill.  I used websites, tutorials, videos and library books to learn techniques such as wire wrapping, stringing beads, making jump rings and working with crimp beads. As well as acquiring a whole new set of skills  I also enjoyed the creative process. A chance for me to combine my basic skills with my love for colour, textures and all things sparkly to create pieces in minutes.  Although I am now learning and practicing a whole new set of skills with my fabric work, I still enjoy bringing out my jewelry tools and bits and pieces when inspired.

These Anthro earrings recently caught my eye:
Alabaster Peacock Earrings via here

I knew that I had a few feathers in my jewelry kit that I could use to create a craftyclaudes one of a kind pair.  So I gathered my supplies and tools:


And after 10 minutes I created these!


I had to trim the white feathers a little to give the black and polka dot feathers a chance to stand out.   It was really good to see that even though I made my last pair of earrings nearly two years ago, I still felt the buzz and excitement of creating.  The Etsy Shop may be closed, I have now moved on from jewelry making, but the skills will always be with me as I continue on my crafty journey. I like that.

Thursday, December 16, 2010

A year round wreath....

I had bought this wreath with the intention of decorating it for Christmas.


Inspired by this beautiful idea:

Tutorial can be found here

However the other day I was looking through my fabric stash and found this beautiful apricot colored satin trim.  It once belonged to a blanket that I cut up to make more of my owlies.  I took the trim and wrapped it around the wreath.  Kept it all in place with some white dressmaking pins.  I then cut up some felt butterflies in a matching apricot color and also used pins to keep them in place.  Finally,  I used the pages of an old book I found during a recent council clean up.  A paper punch used to give them their shape.  Here is the finished wreath:


It now decorates our apartment door.


It only took me less than 15 minutes and really cost $2.99 for the wreath as everything else I had here at home.  

ps:  Dear Santa....If you are reading this post....please I would love love love one of these for Christmas.   As my mobile phone camera no longer does it for me.  


Monday, November 15, 2010

Fabric Book Cover - Diary 2011

2010 - say hello to 2011....
This project takes me back to my school days.  Where we would take great pride in covering our school books at the start of the school year.  Back then we used brown paper or clear wrap to cover them, which although neat, was a little boring.  So for the last few years I have been covering my diary with pretty papers, pictures, stickers lots of colour and designs.

For my 2011 diary, I have decided to dip into my fabric scraps to create a fabric diary cover.    There are some great tutorials all over the net to help you get started if you wish to sew one.   However, a lot of the tutorials I came across involved much measuring, pining, sewing and using things like interface - which I don't have. I also get to use one of my absolute favourite craft material - double sided tape.  Double Sided tape is so easy to use, very forgiving if mistakes are made and also stays very strong.

Here is my step-by-step guide on creating a very quick and fab looking fabric cover:

You will need:
- Diary of your choice (hard cover preferable but not essential)
- 1 piece of fabric (enough to cover the diary with a 3cm seam all the way around)
- Fabric scraps in your choice of color (I chose cotton, both printed and plain, as well as printed linen)
-  Double sided tape
- 2 pieces of card stock in your choice of color
- sewing machine and thread in your choice of color

Step 1:  Open your diary and place it on top of the large piece of fabric you have measured and cut to size.


Step 2:  Place your chosen fabric scraps on top of the bigger piece of fabric. Arrange in the design of your choice and pin in place.

Step 3 - Head over to your sewing machine and sew the pieces in place.  I used a zig zag stitch and went in a crazy pattern.  It is totally up to you on how neat you want to keep this step.  I chose to go wild stylee!

Step 4:   This bit is just like covering your book with paper.  Take your double sided tape and line the edges of the inside flap of your diary.  Peel the backing and fold the fabric over pressing down as you go.  Do this to both the front and back inside cover of your diary.  It may look messy - but don't worry as you will cover all this up in the next step.

Step 5 - Using your chosen card stock,  measure and cut a piece large enough to cover up the inside flap.  You can use as much double sided tape as you like to secure this card stock to the inside.  

Tadaaaa!  Here is the diary all covered in pretty fabric - ready for 2011 adventures

Inside cover of the diary - hiding all sorts of messiness!
I hope these instructions are clear.  Its actually much harder than I thought to write a tutorial.  So if you have any questions just let me know.

Happy Monday everyone!

Tuesday, October 19, 2010

Project #4 - Chair for the bedroom - More chair love

Salvos find
I bought this chair a few months ago from the Salvation Army.   It cost $11.   After changing my mind one hundred times over what fabric to use, I decided to stick with my original idea and used this beautiful Ikea fabric I had stashed away from 2008.

IKEA - Ann-Cathrine Sigrid Stahlberg 2008

After some cleaning with soapy water, I decided that I would not be painting this chair.  I liked the beech colour and apart from a few scuff marks (which I managed to get out with a toothbrush and some warm soapy water) the chair was in great condition.

The tools come out......

So began the task of pulling it all apart.   Starting with the fabric covered piping that went around the chair to hide the staples.

 Taking off the cream coloured fabric was easy as it was very old and had some worn out sections. That revealed this tan/green striped fabric which was also ripped


Chair after some cleaning
Finally I was left with this layer of sponge which apart from a tiny section on the corner of the chair, was also in good shape.  So I decided to stop here and gave the sponge a good vacuum.


Using the old cover as a template, I traced out the shape leaving a 2.5cm (1 inch) allowance.  I also used my brand new pinking shears.  These come in very handy when cutting fabric.  If you don't have an over locker, these are the next best thing as they help stop the fabric from fraying too much.


Once cut, I lay the fabric back on the chair and used some tape to hold it in place. Then began the fun part, the staple gun work (my favourite).


This part is what needs lots of patience as you need to secure the fabric by placing a staple in the middle of each side of the chair first.  Once that is done, take it one section at a time and tightly pull the fabric and staple as you go.   I like to stop every couple of staples and make sure that the fabric has not moved and there are no creases.  I then covered the staples with the piping I made earlier.  This was the hardest part of the chair makeover.  I used this very easy tutorial which helped immensely!


So here is the finished product:


 Very pleased with how it turned out and of course now I have even more chair love than before.....if that is even possible!

Sunday, September 26, 2010

Softies for Mirabel - 4th annual Handmade Toys drive

From one of the awesome blogs I follow - Meet Me At Mikes. A call out has been placed to all crafters out in the community to support The Mirabel Foundation.

The Mirabel Foundation is a very special organization that helps children who have been left abandoned (or sadly, orphaned) due to drug addiction of their parent(s). They provide support to the children and also to their carers who are often the grandparents or the extended family.  You can read more about them here.

The idea is that you create a doll, toy, softies, plushie - anything that a child aged from 0-17 years would like to play with and call their own.  Once made, you send your creations to Meet Me At Mikes and they will kindly organize delivery to the kids!!  I love participating in things like this.  Its where I get to craft away and know that no matter what I create, it will be appreciated by a little person.  That is pretty cool don't you think?

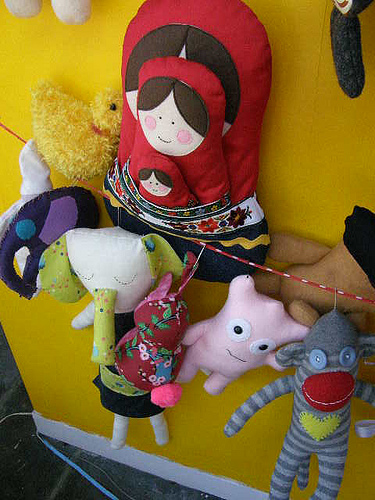
Here are some creations from the past 3 years:


Photos courtesy of the Meet Me At Mikes Flickr group - see link below.
 
You can check out more pics of them here

If you are lucky enough to live in Melbourne (or visiting ) all the creations will be on display in the window of Meet Me At Mikes from 1 to 7 December for all to admire before they are sent to the foundation.

Here is a pic of a past year window display


So am very excited to start planning my softie creations. This calls for a fabric sourcing expedition - all for a fantastic cause!

Friday, September 3, 2010

Project #3 - Wall art

This project came along after we purchased our apartment.   Having a small space we knew that we would have to be very selective on what we had in our space.  So we decided everything had to be pretty things we loved to look at and as much as possible handmade.  So here is the result!

giving old frames a second chance.....

I collected many old (and sometimes broken) frames from household clean up days, second hand shops and some cool big broken bits of frame from here for just $1!    A little bit of glue/nails and some white paint helped to bring them all back to life.  We have used them to display pictures, post cards, recycled birthday cards, photos, original works of art by Martino and some Etsy purchases.    Dad also helped us by making some wall shelves to help display the frames.   They are similar to these you can find at Ikea.

Project 2 - Wall Art

Materials:

old picture frames (preferably wooden)
spray paint
newspaper or plastic to cover your work area
pieces of cardboard boxes

Step 1
 Remove the glass and all backing so you end up with the basic frame

Step 2
Spray a couple of coats of your chosen colour - allowing to dry between each coat as per the instructions on the spray can.  This needs to be done in a well ventilated area and take care to cover anything you don't want spray paint on, as particularly on a windy day, you can end up with colour in places you did not expect (i found this out the hard way - sorry to my old favourite pair of converse sneakers)

frames in all shapes and states of repair!
after glue/nails and white paint - enjoying some dry off time....

Step 3
The best part - frame your fave pictures, stationery, photos, stickers, fabric, collectibles  etc.   You can either leave the glass on the frames (i prefer without) and use old bits of cardboard for the back to hold your chosen pics in place.  I used some old shoe boxes which i cut into fit the back of the pictures and taped them down with masking/sticky tape.


This was such a fun and easy project.  Give it a go and don't forget if you ever want to show off what you made - email me your pic!