Friday, March 30, 2012

Happy Weekend : Follow the Sun - Xavier Rudd


"When You Feel Life Coming Down On You Like A Heavy Weight
When You Feel This Crazy Society Adding To The Strain
Take A Stroll To The Nearest Water's Edge, Remember Your Place
Many Moons Have Risen And Fallen Long, Long Before You Came
So Which Way Is The Wind Blowing
What Does Your Heart Say
"

Wishing everyone a wonderful weekend......hope you all get a chance to get out there and enjoy the fresh air.


xo
craftyclaudes

Monday, March 26, 2012

Pom Pom Hooray!


 A wonderful weekend away with Martino at the wedding of A+F.  We laughed, danced, chatted and felt totally inspired by the stories of the people we met, the love and warmth of the event and the beauty of the surroundings.

The afternoon before the big day involved a little participation from crafty curious folk.  The peeps wanted to know all about the complexities of the tissue paper pom poms.   Therefore, after a little tutorial, my crafty team grew from this.....

to this:


I think some people were totally inspired to get their crafty on....  which made me very     H A P P Y!!    This meant that the big job of carefully opening and fluffing up the pom poms was made that much easier - many hands/light work and all ;-)  .  By the end of that afternoon, our cabin was filled with the tissue paper pretties,  ready to be hung up the following morning. 


After the ceremony rehearsal and a little breakfast, the exciting job of putting the decorations up began....


Having help from many qualified Architects (and their well known eye for detail) felt a little daunting at first.....but I need not have worried.  The result was more beautiful and effective than I could have imagined:

The very clever groom made these pretty tea light candle holders.....very effective and thrifty!


I am truly honored to have been asked to have my crafty input on this very special event.    To have the guests enjoy these creations and to take them home at the end of the weekend, was more than I could have wished for.  Craftyclaudes made with love, to be enjoyed by others, because they also fell in love with them.  Super!

Thursday, March 22, 2012

P is for...... Paper Orb


This genius project takes cupcake liners + hot glue gun + 1 paper lantern and transforms into this!

all pictures via Design*Sponge

So thrifty and dramatic. If you are inspired check out the tutorial here.


Tuesday, March 20, 2012

Wedding decorations

"Hang in there Claudes.....and take that magic concoction we mentioned"  - herbal remedy advice from Alba y  Miguel...

My crafty mood took a battering last week as I battled a case of the flu which really drained all energy (crafty kind included) and all I was good for was sleeping and drinking lemonade.  Even catching up on my blog reading list was a struggle. Fevers, chills and crazy nightmares took over.   However, this week I am back to feeling almost normal, which is just as well as we have a wedding to go to!  Weddings make me happy and excited.  A dose of L.O.V.E  will cure all that ails me I am sure.   I have now finished the wedding decorations for the event.   Sixty odd tissue paper pom poms in various sizes and shades of white.  Paper doily banners, felt buntings and a sign for the photo booth all now ready to go.    Here is a quick tutorial on the sign I made for the wedding photo booth:


Project:  Super Easy  Wedding Photo Booth Sign


Materials I used:
-  Foam Core for this project I used 60cm x 40cm
-  Paper doilies (various sizes)
-  Scrap booking paper slightly smaller than the foam core (for this project I used 50cm x 30cm)
-  Scrap booking letters
-  Double sided tape
-  Paper punch
-  Scissors
-  Twine


Step 1:   I cut long strips of double sided tape and placed them along the edge of the foam core and one strip across the middle.  I then placed the paper doilies around the foam core to form a pretty scalloped edge.  I placed the cream coloured card stock to cover up the remainder of the doilies. (I did not take a picture of that step but you will see below what I mean).


Step 2:  Using my paper punch I cut out these little shapes from various scrap booking paper sheets.


Step 3:   Using double sided tape I stuck these paper cut outs to the centre of the paper doilies.


Step 4:   The rest was as easy as placing the various elements - Scrap booking Letters, doilies, paper cut outs etc - using double sided tape to stick them to the foam core.  Finally using some tape to secure the twine to the back of the foam core ready for hanging.


Here is the finished sign:


Sorry the photos are a little dark. I finished this project late in the evening.....you have to take advantage of the creativity when it hits you.  


Friday, March 16, 2012

ETSY Portraits - Arts for Transit - Sophie Blackall


I recently watched this Etsy Portraits video featuring Australian born Brooklyn based Artist Sophie Blackall, a successful children's book illustrator, as well as author of Missed Connections - Love Lost and Found. Sophies illustrations are inspired by the many ads placed in the Missed Connections section of online bulletin board Craigslist. For those not familiar with Missed Connections/Craigslist, the idea is this: You are on a train/at a park/at a private party in some trendy Soho Loft and you happen to make a connection with a stranger and by some twist of fate, nothing ever eventuates. You cant get that person out of your head and you hope that by some chance, they feel the same. So what does a New Yorker do? they place an ad in Missed Connections. Where they hope, by some chance, to reconnect with that person. Sophie spent many hours reading the ads and drew inspiration from them to illustrate her favorites. Here are some of mine:


The New York MTA recently invited Sophie to create a poster for their Arts for Transit program for 2012.  The program invites 2 artists a year to design Subway related posters that will then appear on the trains all over the city.  For this Sophie had to to narrow down her list of characters to only 34 (as that was what the space provided would allow).  I imagine this would have been very hard for her, as looking at all her work, there is surely enough there for at least 3 posters!

Here are my 2 favorite scenes from the poster:
 

 Having ridden on the subway many times, I can assure you that Sophie would have enough inspiration to draw her characters from for many years to come.   One of the many reasons why Martino and I love the city.

View and purchase the poster via the MTA site here

Visit Sophies Etsy store to purchase her work here

Tuesday, March 13, 2012

Once upon a time I was a.......

In this series I share with you some pretty cool projects I have seen around my virtual travels. Take everyday objects (ones that we usually throw away without a thought) a tutorial and a few basic tools to create  unique recycled pieces.   Check these out:


A globe becomes a lampshade

via here

A big pretty out there jumpsuit becomes a chic dress


Check out this clever refashion and many many more here
Your old beer/wine bottles become gorgeous decorative vases


via here


 Bottle cap + Magnet = jazzes up your fridge

Via Here

There are so many resourceful people in the DIY, craft and refashion community.  I hope to share many more of my findings.

Thursday, March 8, 2012

Wedding decorations - Tissue Paper Pom Poms

This one....I get to keep in our hallway.  A little bit girlie chic.

We have a family wedding coming up soon.  The lovely Miss A and her handsome beau Mr F.  The wedding celebrations will take place over a weekend and will be in true Aussie style - a beach and bush wedding. We are very excited and honored to be part of this special weekend.  To help out I am making the decorations which consist of tissue paper pom poms of all sizes as well as decorations for a photo booth backdrop.   As the surroundings will be all natural the decorations are to be very simple.  So we have decided on all white pom poms.   Here are some pictures of the project so far:
Pink test pom poms.  I loved how these turned out. Very puffy and fluffy and pink.  Wonder if Martino will notice if I filled our bedroom with these?

 My aim is to create 80 of the little puffy pretties in 3 different sizes.  They will be hung with some clear fishing line all around the dining pergola/main area kind of like these:

Via Pinterest

As we have a big 3 hour drive to the venue, I have got all of them to the point where they just need to be opened and hung.
ready to be opened up
These were very easy to make using tutorials I found all over the net, especially, on Youtube.    So next time you are looking for party decorations why not give these a go. For the $1 investment in tissue paper, the results are very striking and will last much longer than a balloon.


Tuesday, March 6, 2012

Give it a go: Blind Contour Sketching

Yesterday I was reading about an artist named Ian Sklarsky and his use of an old drawing technique called Blind Contour Sketching (or Drawing). The technique requires you to look at your subject and draw them without looking at your paper or lifting your pen. Here is an example of his work:


So I decided to give it a go myself.  My subject (Martino) reluctantly posed for me.   He really should not have worried because quite clearly, I did a stellar job in capturing his likeness:

And before you ask....no...I don't live with a lumberjack or the elephant man!   haha....
I thought this was a quick and fun challenge.  I can also say wholeheartedly that drawing is not my strong point.

To see more of his work click here 

Monday, March 5, 2012

Back to Crafty Blogging for 2012......


I missed this little blog.

Having been away from it for almost 3 months has been a nice break.   A time where I have been able to take in new experiences and knowledge as well as reassess the things that are important to me.

There is so much awesomeness out there that I want to share (and I do miss sharing).  Every day I am amazed by the very talented, thrifty, funny, generous and creative people I come across.   So in the spirit of sharing....Craftyclaudes blog resumes its normal schedule starting......now :-)

Incorporating my project from 2011 (1 photo a day )  I now share with you some of what I have been up to in the last 3 months:

Watching Sunsets.....the colours, smells and sounds of the daylight coming to an end always stops me in my tracks.  


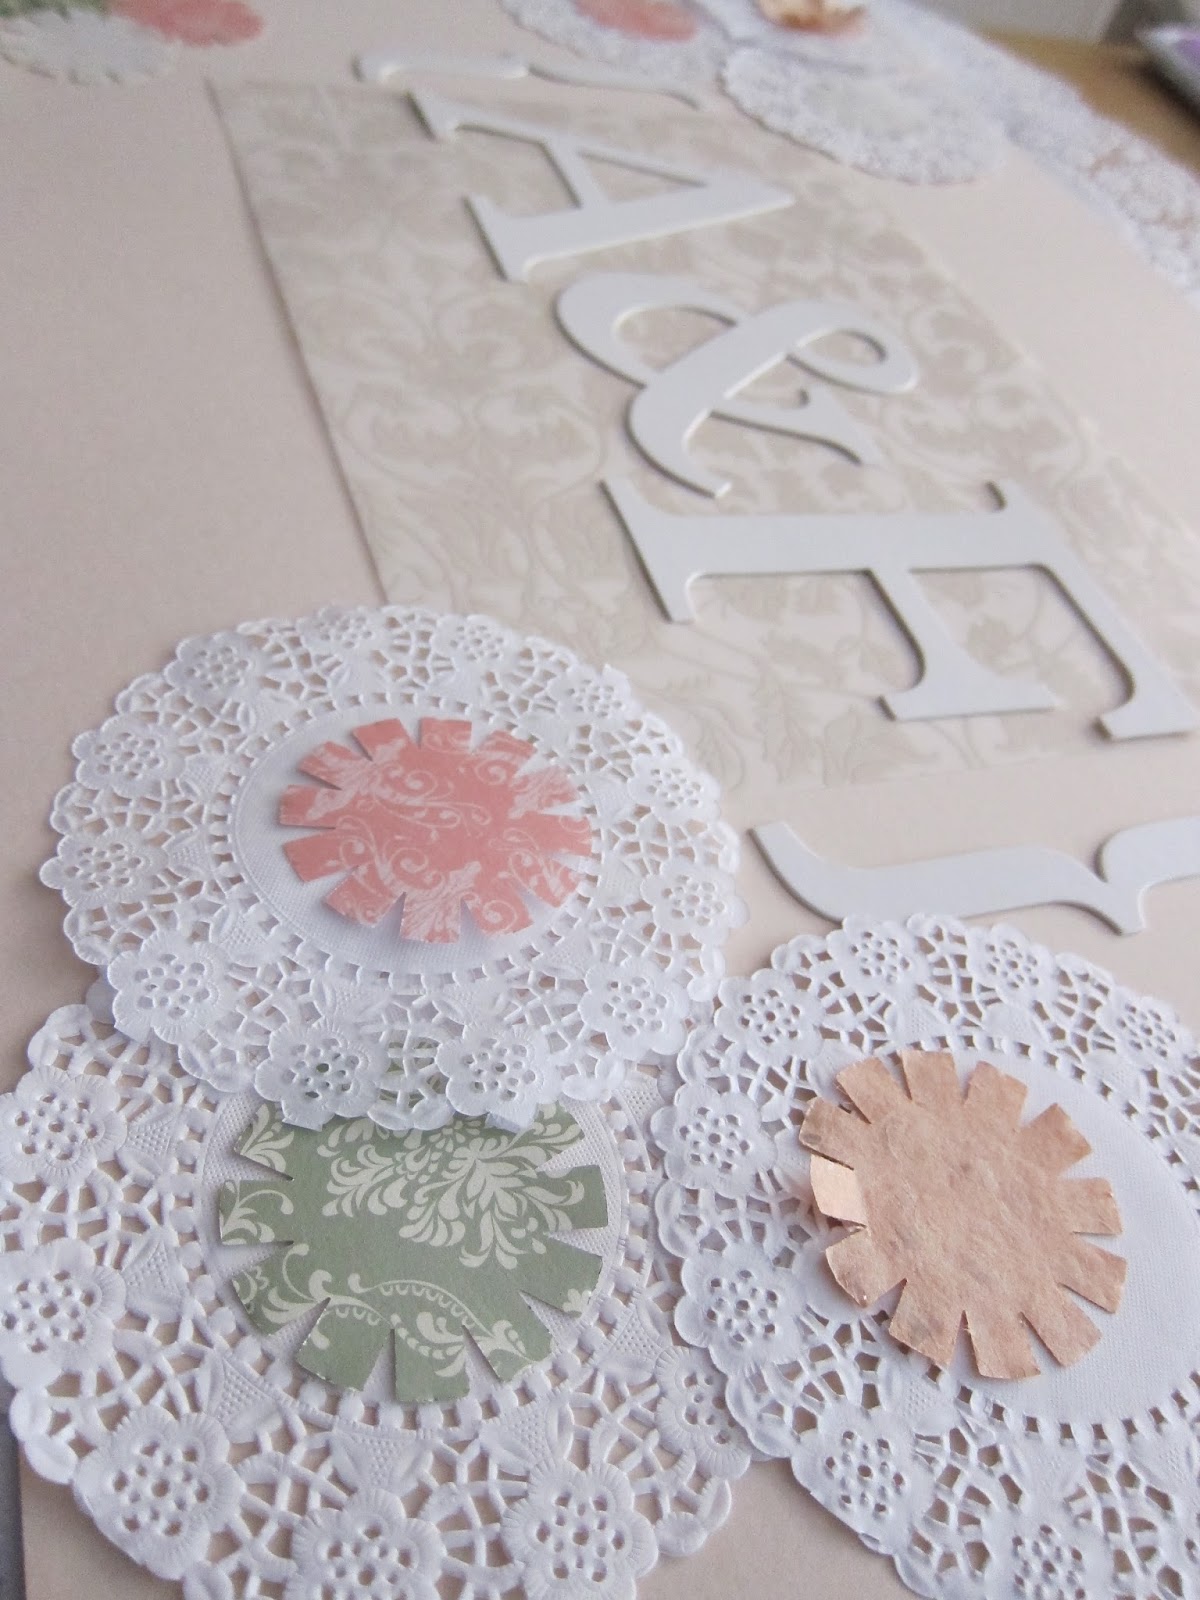
Making tissue paper pom poms and other paper decorations for the wedding of A + F.  Thank you pinking shears, jewelry wire and fishing line - all things I have collected over many years of different crafty pursuits.


Learning to sew my own clothes.  I have thought about making pieces from patterns, however, I still find it difficult to read those things.  So with my very basic sewing knowledge (from Year 8 High school) and tonnes of sewing tutorials online, I am giving it a go.   Started by copying pieces I already have in my wardrobe.  The finished  pieces coming to my blog as soon as I finish them....you just cant rush these things ;-)


As well as making pieces from scratch, I am also getting into a little Refashioning.  Taking existing pieces that may no longer do it for me (in the fashion sense) and a little cut here, a bit of a sew there and voila!  a new refashioned piece is born.   There are many many people to draw inspiration from online.  Some clever ladies refashioning 1 piece a day!  that is very impressive.   Who knew grandmas old frumpy dress could turn into very fashion forward pieces.    Will be sharing lots of before and afters from the refashion world.


Playing with my new sewing machine.   It was time for an upgrade.  The trusty dinosaur (my mums old Singer) was a real workhorse but for a few years now, her rattling bones were begging to be retired.   This new machine has 40 stitches, automatic needle threader and a light!  A light people!   because sometimes its the little things that make the biggest difference.


Growing an edible garden in our little balcony.   Learning about organic and seasonal plants, soil composition, worm wee and other fascinating plant facts.   Encouraged by many people online growing their plants in the tiniest spaces and in the most unfavorable conditions with surprising results.  It has been very inspiring.  So far we have lettuce, garlic, habanero chillies, coriander, basil, chives and spearmint.  All growing nicely in pots and giving our balcony some colour and our taste buds a treat!  as there is nothing more rewarding than sitting down to a meal that has even just 1 ingredient that you helped to grow.  


Thats all for now but I look forward to sharing lots more ......

xo
claudes

ps - I miss you all my online blog friends.  Thank you for keeping in touch and for wondering where I and my Facebook page went to.  For the moment I am only keeping the blog going as all other social media takes a little more time to keep up with.   I remain inspired by all your blogs and hope that I get to add a little bit of "I will try that"  to your day as you have done to mine  :-)